At my house, we love our Sonos music system. We can listen to any songs we like from any room and it provides an interface that everyone in the family is comfortable using. It's a music lovers dream setup.
While it is the radio of the future, our most common usage is as the radio of the past. We tend to tune it to one station and leave it there. By far, our most common interactions with the system are changing the volume, and pausing/playing often creating scrambles to find a phone to turn down the volume in order to answer a different phone. What we needed was an analog interface to this digital system that was always at arms reach.
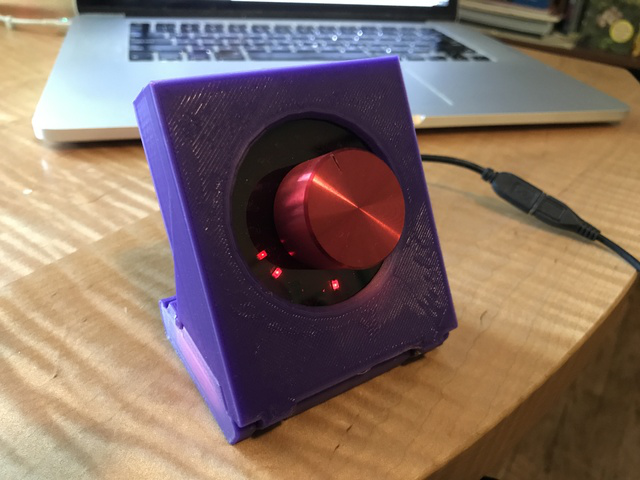
Never leaving behind the chance to make a gadget, I started building the Sonos Volume Knob... Here's a quick demo:
The Device
Physically the VolumeKnob provides a set of LEDs that display the volume on a given Sonos device, and a knob for changing the volume on that device. The VolumeKnob is also a web server that provides a web interface for choosing the Sonos Device to work with, as well as buttons to play, pause, and change the volume on that device.
VolumeKnob leverages the powerful Elixir ecosystem to bring a rich and responsive environment (even on a Raspberry Pi Zero W). The firmware is created using the Nerves toolchain, a set of tools for creating a minimal Linux firmware that boots directly into an Elixir application. In this case, I used a Phoenix LiveView web app. The efficiency, fault tolerance, and concurrency that Erlang and the BEAM are known for scales down to these simple processors where resources are even more constrained. The Nerves tools provide a great workflow for developing the firmware and their many support packages provide a great foundation for building applications.
Phoenix's responsive and lightweight LiveView pages provide instantaneous updates to changes in the device's status as well as a UI for more complex user interactions. In our case, the VolumeKnob only interacts with one Sonos zone at a time. So the LiveView UI provides a pop-up menu of all zones, to choose which zone to adjust.
Software
The software side of this is largely facilitated by three external packages:
- sonex is a great package for querying and interacting with a Sonos system. It stores the latest state of the Sonos system and uses Elixir's Registry module to relay Sonos events to subscribers.
- rotary_encoder package allows us to specify the GPIO pins we will connect up to the encoder for our knob inputs. It also uses Elixir's Registry for event notifications.
- tlc5748 is a utility package I wrote for interacting with this device. It controls the lights!
For overall device management, I'm using a GenServer at VolumeKnob.Device that subscribes to events from rotary_encoder and sonex. It receives events from those packages through the code shown below, responding to knob movements, knob clicks, and changes in the Sonos device's volume.
  def init(data) do
    {:ok, _} = RotaryEncoder.subscribe("main_volume")
    {:ok, _} = Registry.register(Sonex, "devices", [])

    {:ok, data}
  end

  def handle_info({:click, %{type: :up}}, state) do
    VolumeState.get_current_device()
    |> Sonex.get_player()
    |> toggle_playing

    {:noreply, state}
  end

  def handle_info({:travel, %{direction: :cw}}, state) do
    VolumeState.get_current_device()
    |> Sonex.get_player()
    |> increment_volume(3)

    {:noreply, state}
  end

  def handle_info({:updated, _new_device}, state) do
    case get_current_player() do
      %{player_state: %{volume: %{m: vol}}} ->
        Tlc59116.set_value(vol)

      _other ->
        :ok
    end

    {:noreply, state}
  end
Likewise the Phoenix LiveView subscribes to the Sonos system when the view is mounted. Events from the web interface are relayed to the Sonos system and the web UI state is kept up to date through this simple code. LiveView then handles the hard part of seeing exactly what elements are different in order to send as little data as possible back to the user.
def mount(%{}, socket) do
    if connected?(socket),
      do: {:ok, _pid} = Registry.register(Sonex, "devices", [])

    {:ok, decorate_socket(socket)}
  end

  def handle_event("pause-device", %{"uuid" => uuid}, socket) do
    uuid
    |> Sonex.get_player()
    |> Sonex.stop_player()

    {:noreply, socket}
  end

  def handle_event("play-device", %{"uuid" => uuid}, socket) do
    uuid
    |> Sonex.get_player()
    |> Sonex.start_player()

    {:noreply, socket}
  end

  def handle_event("volume-slider", %{"uuid" => uuid, "value" => value}, socket) do
    uuid
    |> Sonex.get_player()
    |> Sonex.set_volume(value)

    {:noreply, socket}
  end

  def handle_info({:discovered, _new_device}, socket) do
    {:noreply, add_sonex_info(socket)}
  end

  def handle_info({:updated, _new_device}, socket) do
    {:noreply, add_sonex_info(socket)}
  end
Lastly, there is a very similar process that only runs on the device which monitors interactions with the WiFi network. Here, we can change the LED display in response to network events as well as initiate the Nerve's `VintageNetWizard` package. I start it in response to a long button press and it leads the user through setting up their WiFi network automagically, a necessary but formerly painful part of developing a turnkey solution.
Otherwise the Phoenix app contains almost all of the functionality here. This allows me to do most of the development on my laptop which makes for a fast development cycle (host mode). I used a stub package to fake the presence of the LED drivers and can send the application events to mimic the knob turning and clicking. Not that problems won't arise when moving on to the real hardware — just that you shouldn't debug anything but them on it! Do as much development in host mode as possible; you'll be glad in the long run. Consider this step one.
All of the source code and other helpful assets are available here.
Firmware
Thanks to the Nerves toolchain, generating the firmware is as simple as calling mix firmware from the /vknob_fw/ folder. Once this finishes, compiling the code can be written to an SD card using mix firmware.burn which is ready to be put into the RPI0W and run.
If there are problems running on the RPI0W, Nerves provides some handy debugging tools to help you figure out the problem.
If needed, connect the RPI0W connected to your laptops USB port, this will not only power the device, but allow you to ssh to it over USB! In this case ssh volumeknob.local gets me an iex shell on the running device just as if it was on the WiFi Network (thanks to VintageNet and specifically the vintage_net_direct package).
Then use RingLogger.next to view all of the logs since startup or RingLogger.attach to see the logger messages in real time. This is almost always enough to diagnose the problem at least.
The Build (fun part)

Pictured in the this image is the second step in the build.
I'm still running the app in host mode, the debug environment, and using my usual tools, but now it runs on the Raspberry Pi, under Raspian OS. So development is slower, but now I can remove the device stub classes and interact with the rotary encoder and the LEDs for real.
Pictured here is the full system. Once this is working, the software is ready to be made into firmware and the hardware can be assembled.
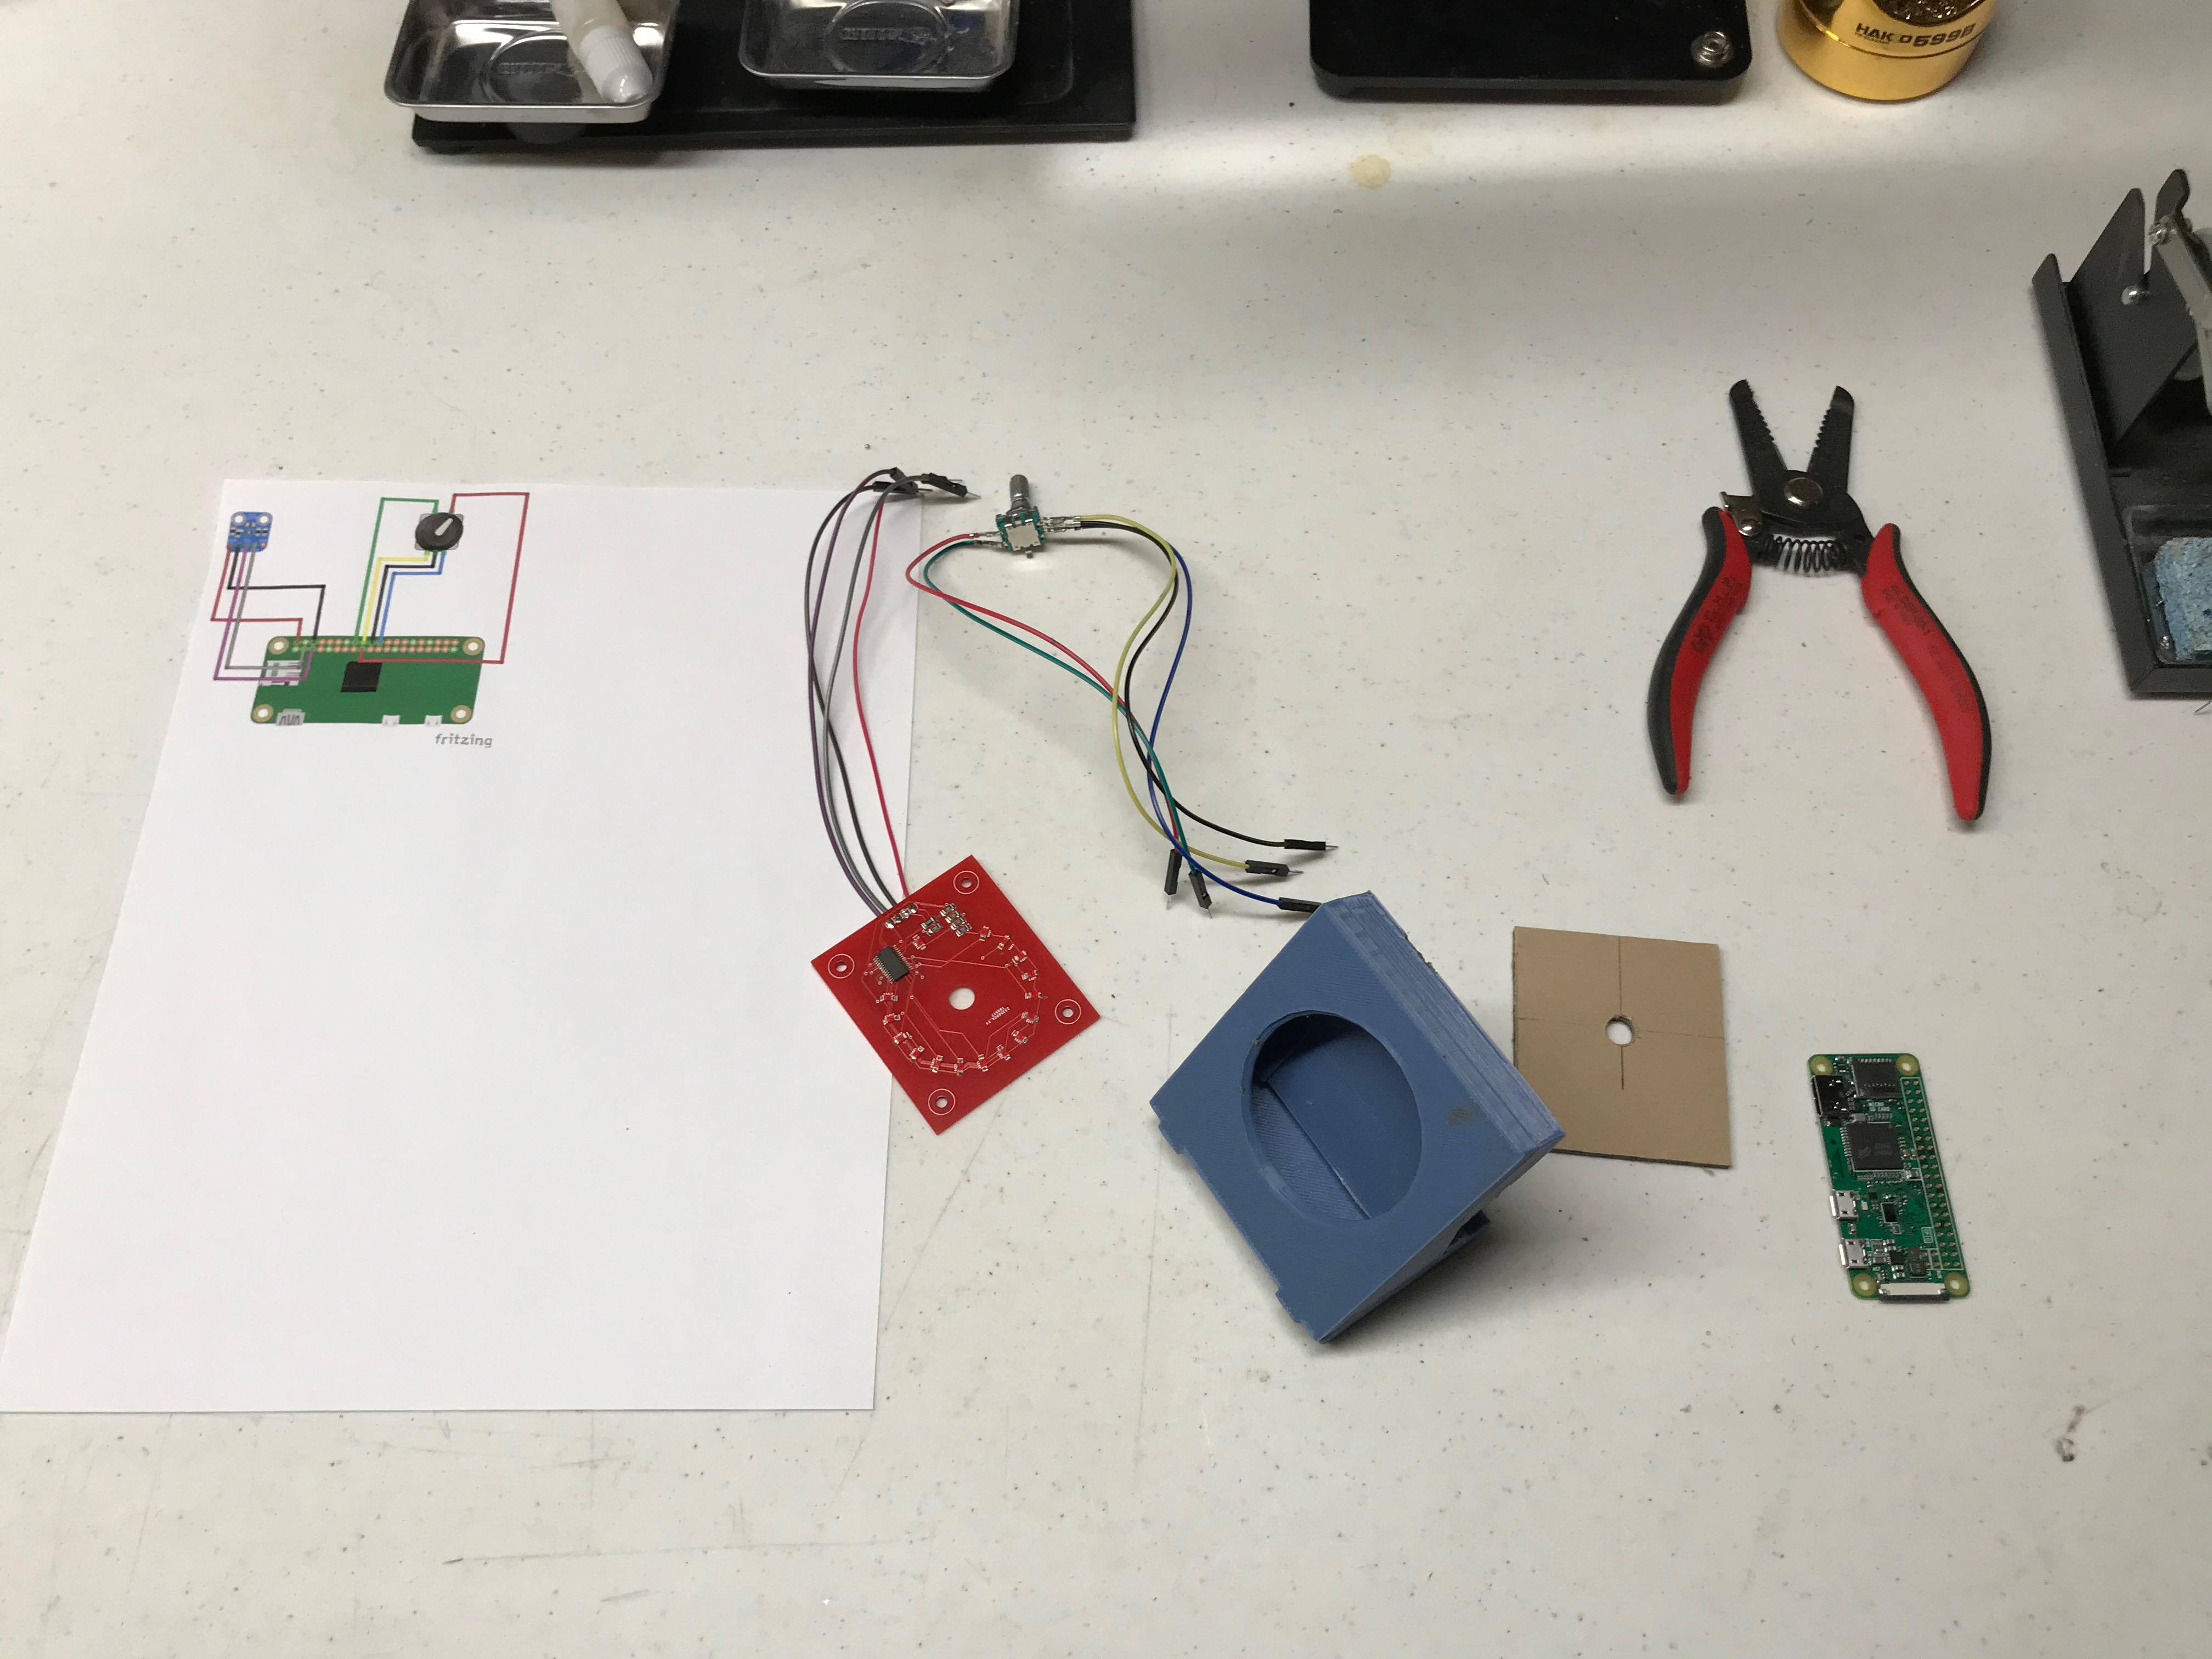
In image two, I've assembled all of the parts needed to make VolumeKnob; it's a pretty simple build overall.
- rotary encoder and LED display card (I bought this pair here)
- 3D printed case, available for download here
- 56mm x 62mm piece of smoked plexiglass that needed to be cut and drilled
- Raspberry Pi 0W
Also shown and needed are the wire strippers and the trusty Fritzing diagram.
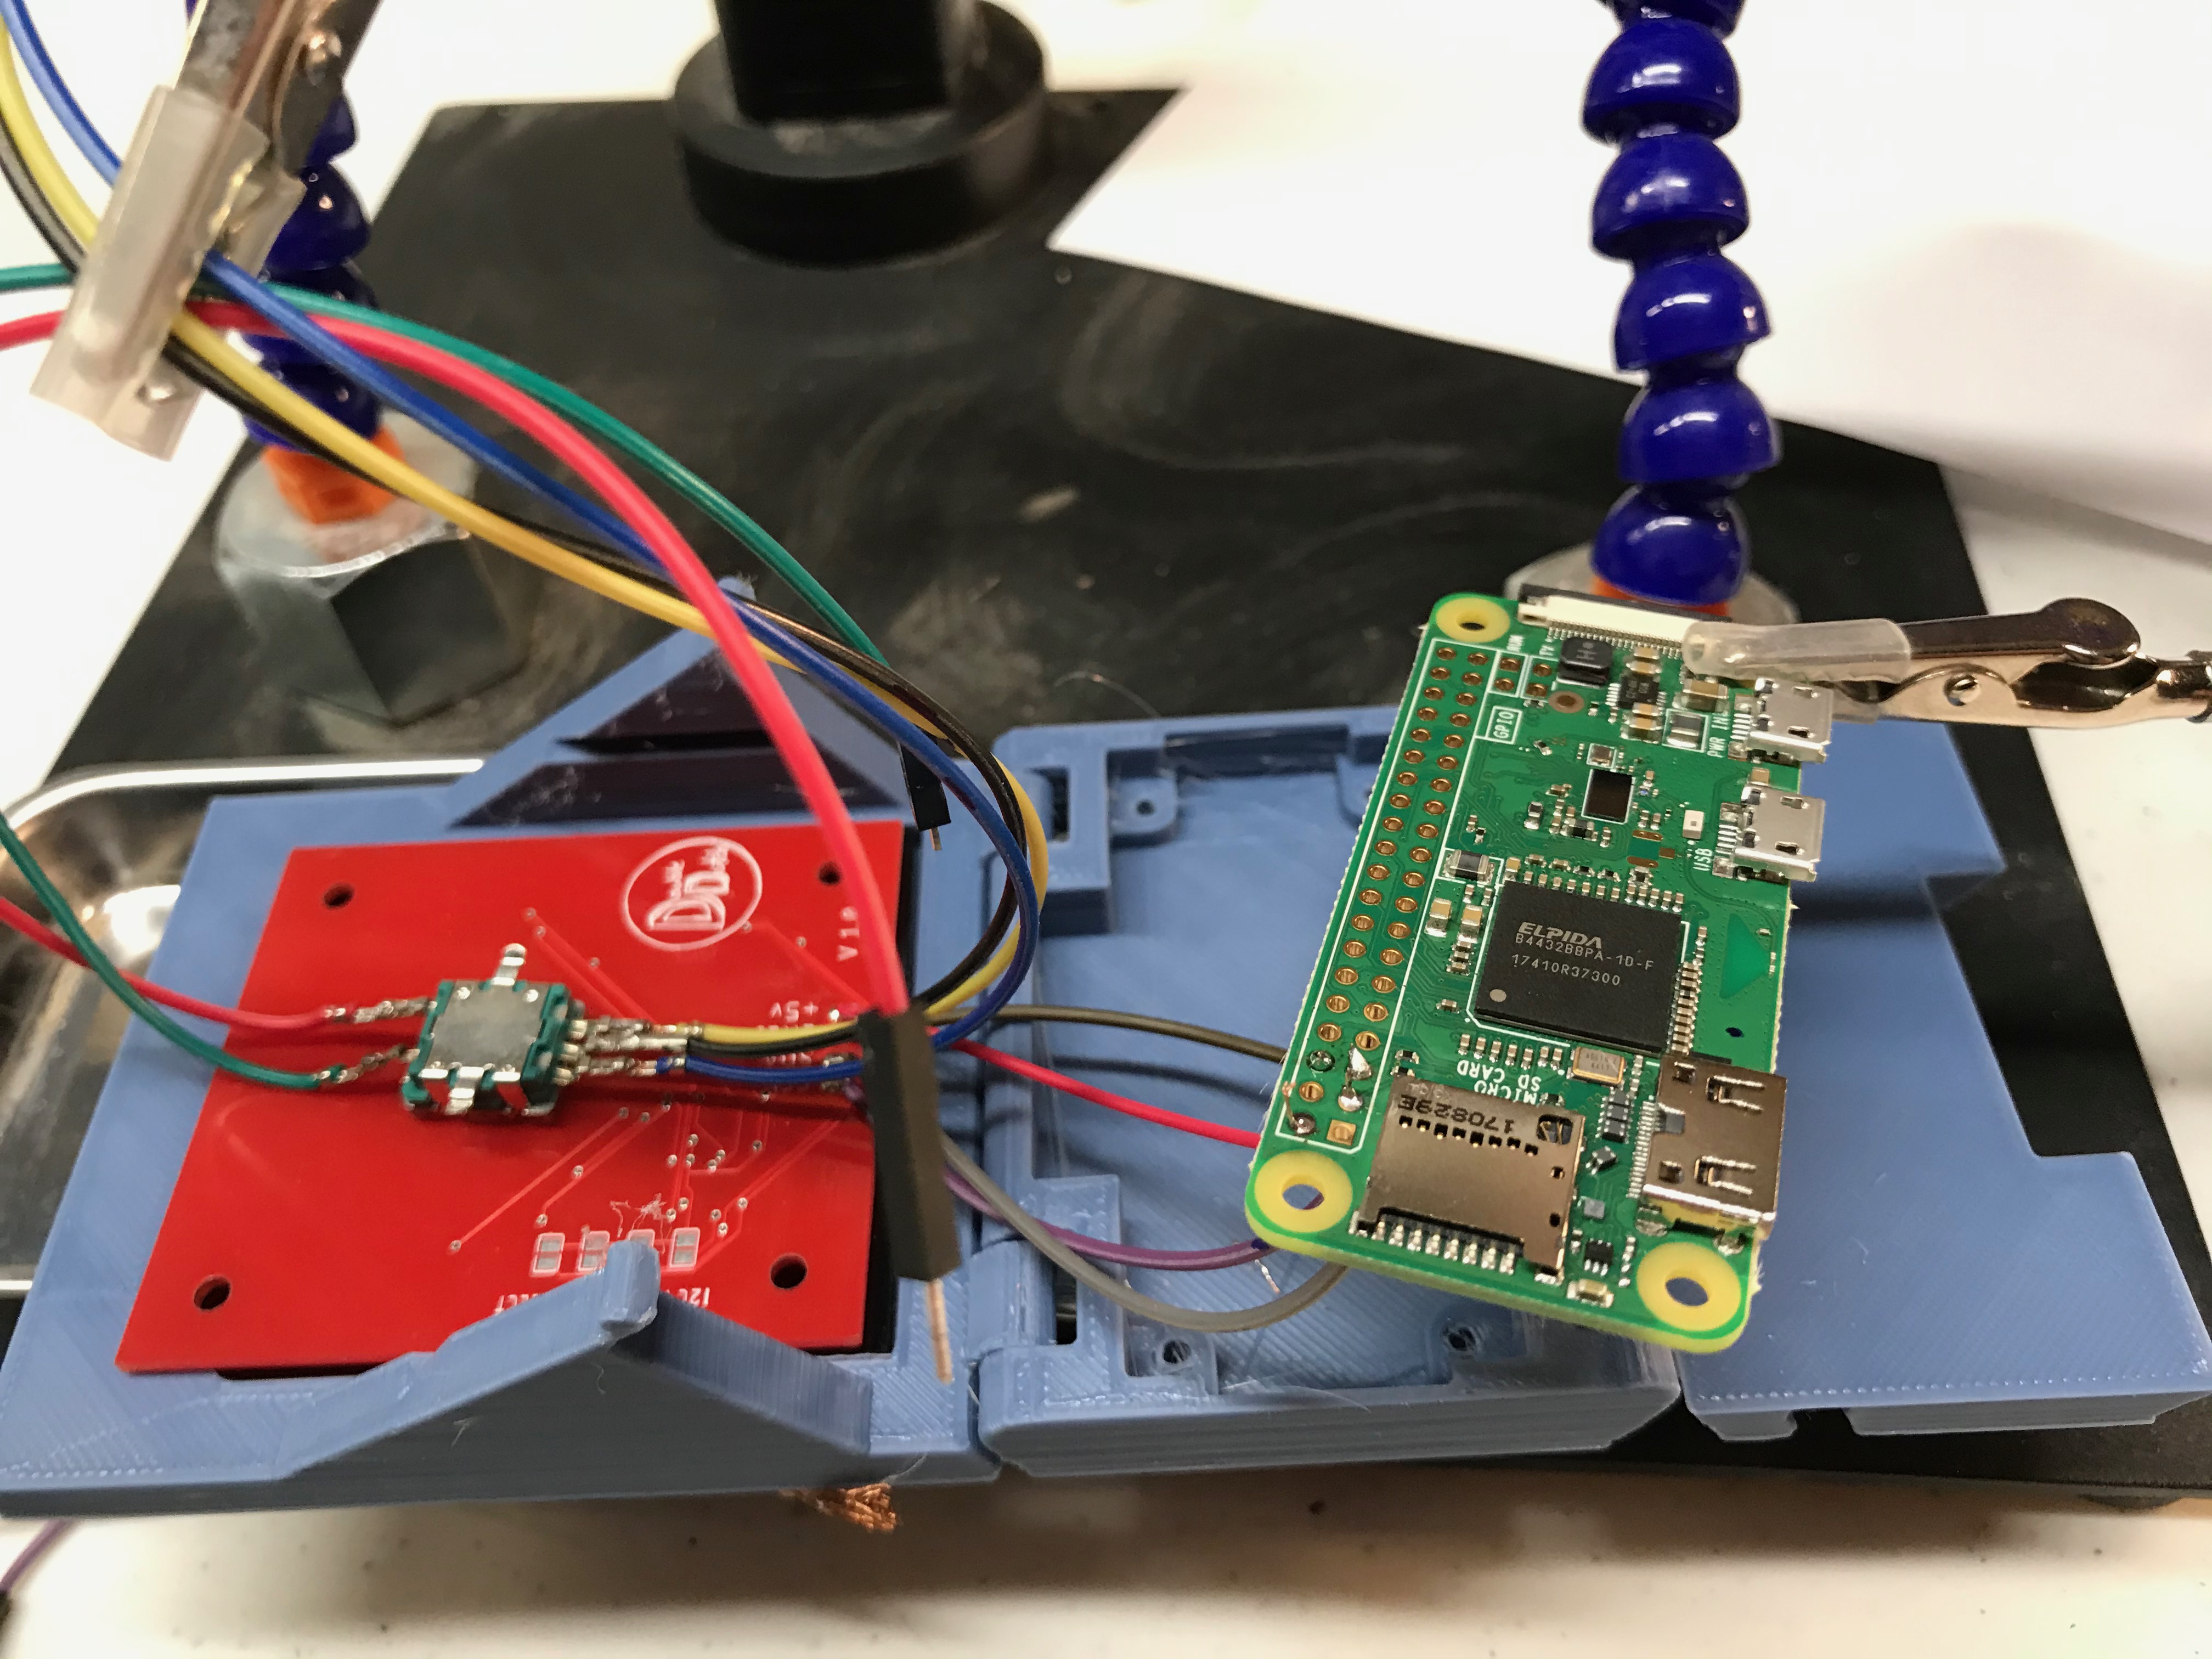
Finally, in image three, it's time to cut some wires and start soldering. I'm constantly checking how the soldered device lines up with the case to avoid later construction issues.
Take time while soldering to make sure the wires will lie flat as you place the RPI0W in the case. Too much slack will make it hard to close the case later.
Final Thoughts
This has been a really fun project that let me explore solutions using Elixir, the BEAM, and LiveView as well as learn details about the operation of my Sonos system. It wasn't too hard to put together and has now left us with a fun and useful gadget that makes our Sonos system even more enjoyable to use.
Related Links

-
Debounced Rotary Encoder
 The best rotary encoder out there.Debounces in hardware where it belongs!
 -
Rotary Encoder with LEDs


